Home
About
Features
Showcase
Updates
Contact
Sign In
Sign in
Updates
Articles & Resources
News & Updates
RAVE's NEW Reporting Button & Company Key Task Report
News & Updates
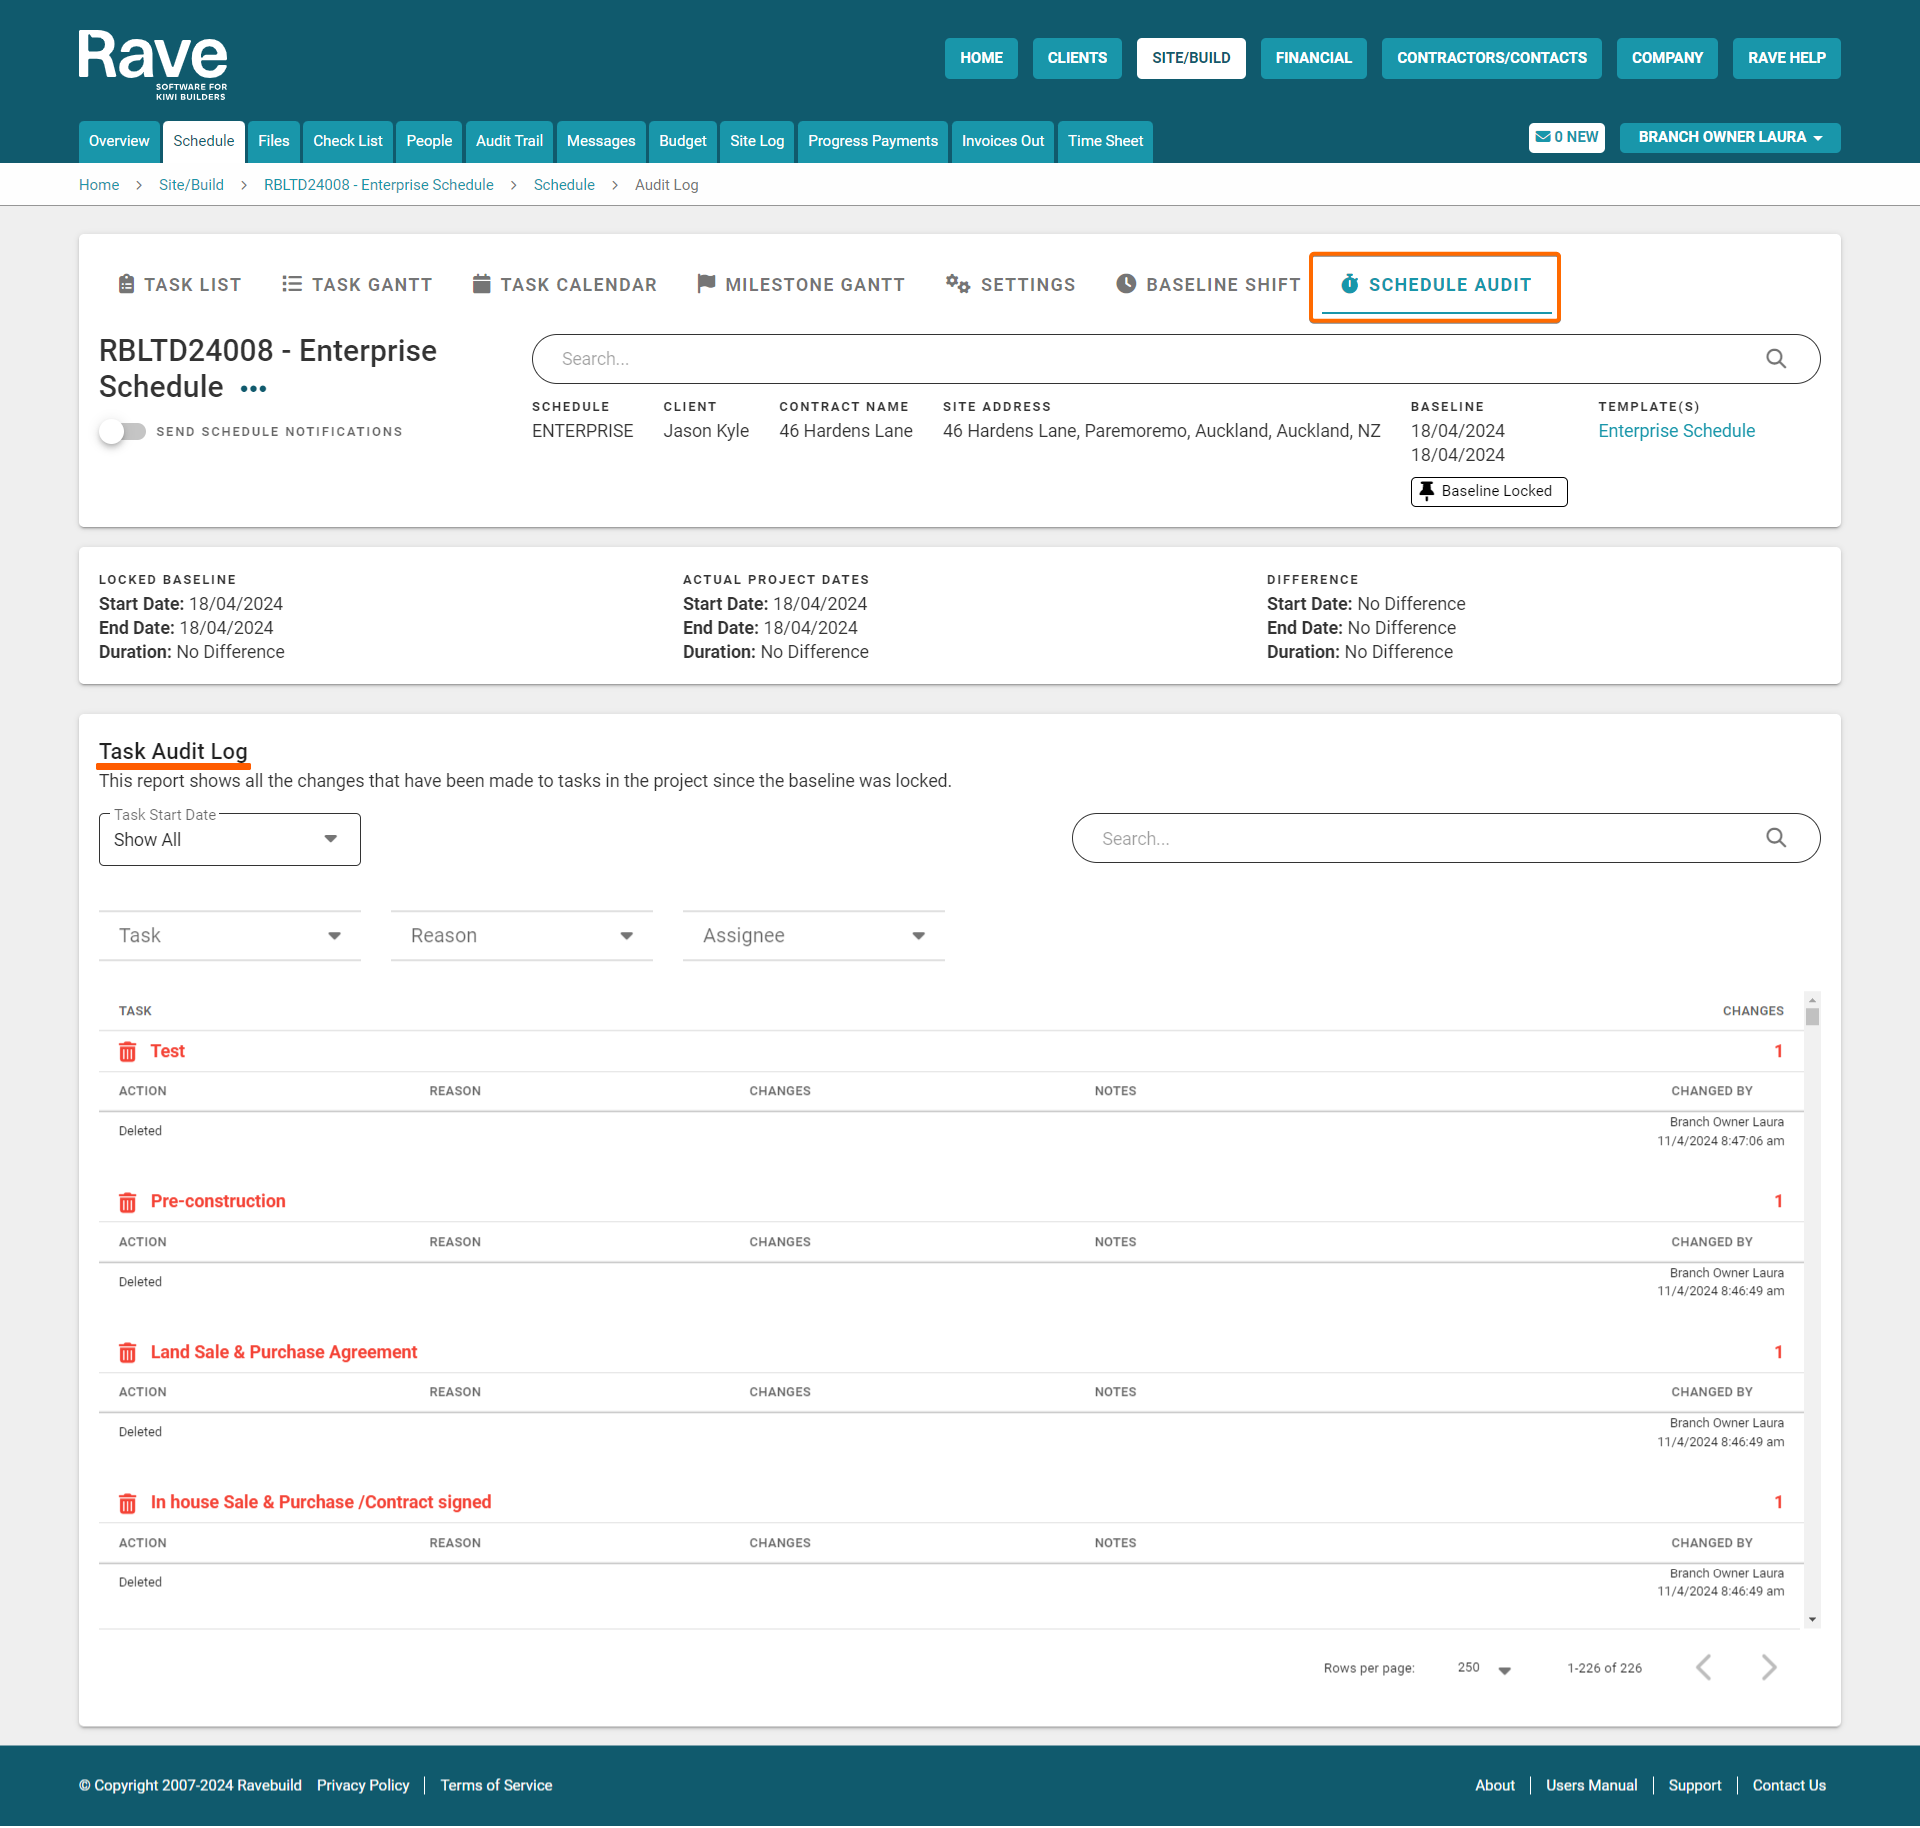
RAVE's Enterprise Scheduling - Schedule Audit
News & Updates
Create a Client Invoice from Multiple Purchase Order(s)
News & Updates
Let's take a look at Rave's Financial Management System (FMS)
Latest Posts
News & Updates
RAVE's NEW Reporting Button & Company Key Task Report
News & Updates
RAVE's Enterprise Scheduling - Schedule Audit
News & Updates
Create a Client Invoice from Multiple Purchase Order(s)
News & Updates
Let's take a look at Rave's Financial Management System (FMS)
News & Updates
Update to Charge Up Client Invoices
News & Updates
General Update - 22 March 2024
Make charge up a breeze with Rave's new 'Uninvoiced' and 'Partially Invoiced' Bills filter.
1 / 33
Next